Remote Desktop Access via DCV and VNC Connections
Last update: June 08, 2023
Establishing a remote desktop connection from one system to another allows the desktop on the remote computer (TACC resources) to be displayed on the local system (your desktop). For HPC purposes remote desktops are used for visualization applications and other graphics-library enabled applications.
Remote Desktop Methods
TACC provides three methods of setting up a remote desktop:
-
VNC connection: A (Virtual Network Computing) VNC connection allows you to harness TACC resources' compute or visualization nodes to display an image on your own desktop display. After logging on, submit a special interactive batch job that:
-
allocates one or more compute nodes
- starts a
vncserverprocess on the first allocated node - sets up an SSH tunnel through the login node to the vncserver access port
Once the vncserver process is running on the compute node and a tunnel through the login node is created, the job script writes the connection port to the job output file, vncserver.out. Then, connect the VNC viewer application to that port. The remote system's desktop is then presented.
-
TACC Vis Portal: Available to all Frontera and Stampede3 users, the TACC Analysis Portal provides an easy-to-use web interface to submit a VNC job script.
-
DCV connection: Desktop Cloud Visualization (DCV) traffic is encrypted using Transport Layer Security (TLS) through your web browser, obviating the need to create a separate SSH tunnel. A DCV connection is easier to set up than a VNC connection, however TACC is limited to the number of concurrent DCV licenses. Stampede3 and Frontera are currently the only TACC resources allowing DCV connections. The DCV job script writes connection information to a file,
dcvserver.out. You can connect to a DCV session with any modern web browswer.
TACC Analysis Portal
Connect to the TACC Analysis Portal at https://tap.tacc.utexas.edu. Everyone with a project allocation on Frontera or Stampede3 may use the TACC Analysis Portal.
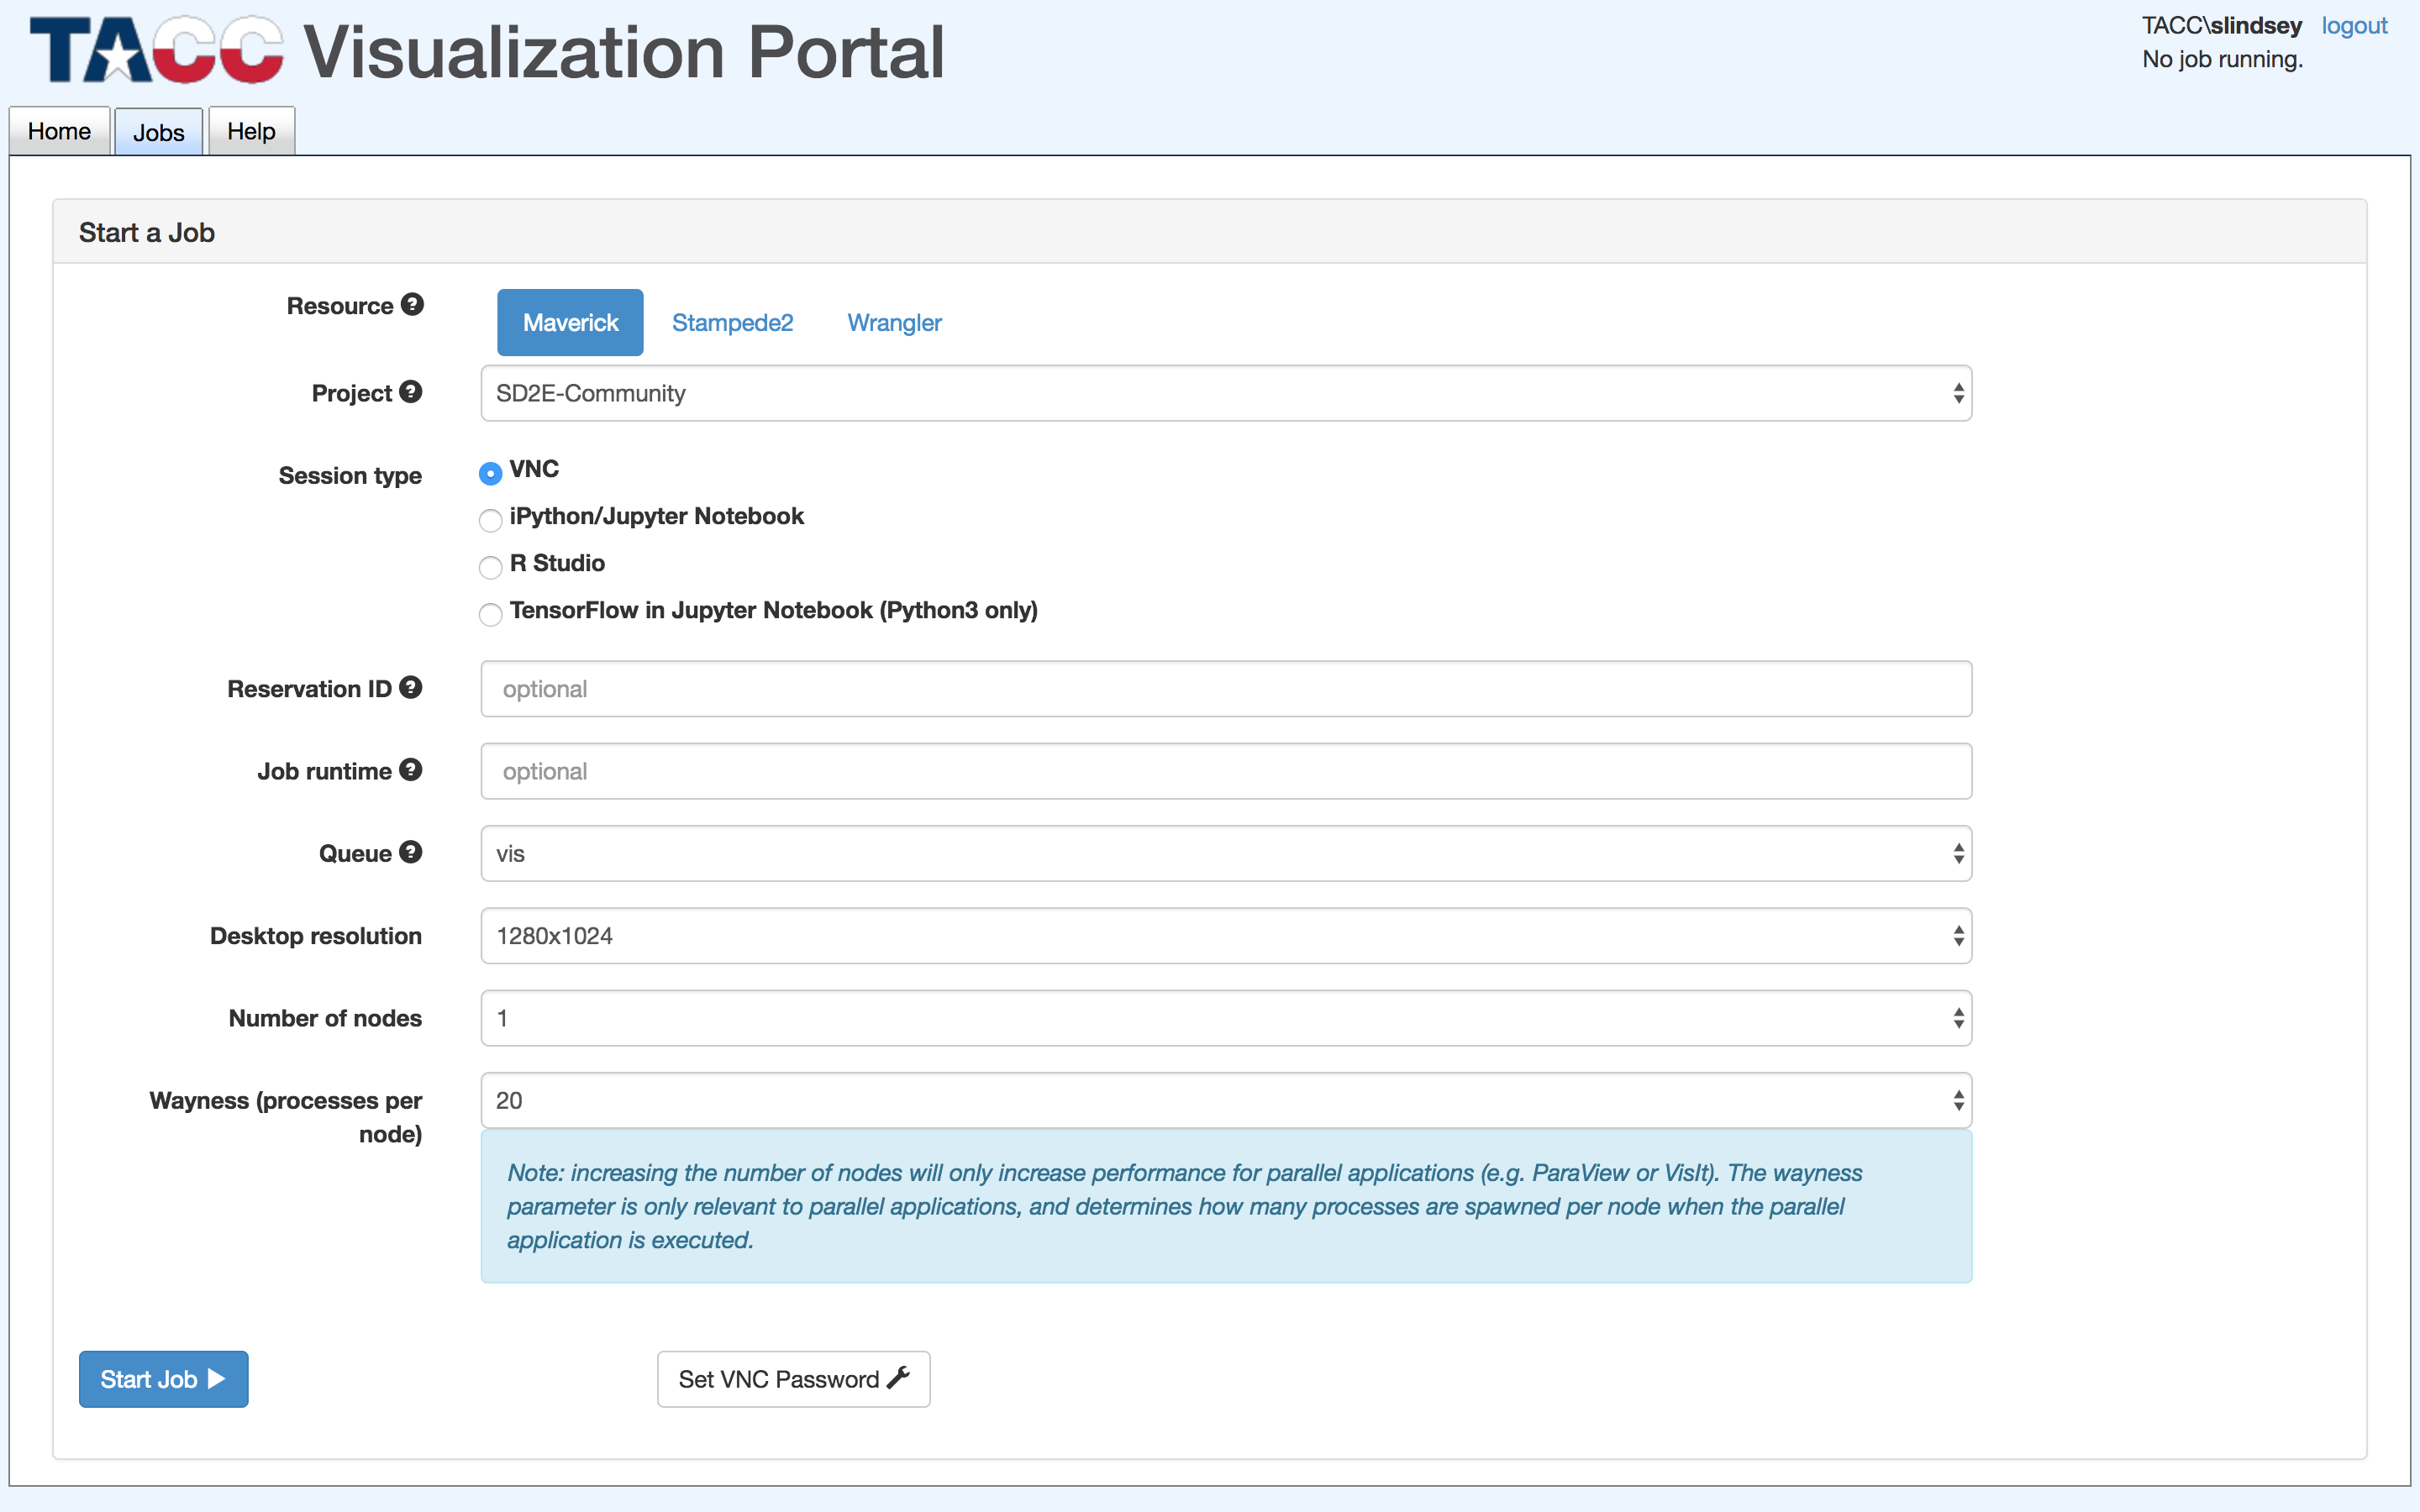
DCV & VNC at TACC
TACC resources [Frontera]TACCFRONTERAUG], Stampede3 and Lonestar6 all offer remote desktop capabilities via a VNC (Virtual Network Computing) connection. Frontera and Stampede3 also provide remote desktop access through a DCV (Desktop Cloud Visualization) connection to one or more nodes.
TACC has a limited number of DCV licenses available, so concurrent DCV sessions may be limited. TACC has provided two DCV job scripts for two different scenarios:
/share/doc/slurm/job.dcv2vnc- request a DCV session, if none is available, then a VNC session is submitted/share/doc/slurm/job.dcv- request a DCV session, if none is available, then exit
You can modify or overwrite script defaults with sbatch command-line options:
-t hours:minutes:secondsmodify the job runtime-A projectnamespecify the project/allocation to be charged-N nodesspecify number of nodes needed-p partitionspecify an alternate queue
See more sbatch options in the Stampede3 User Guide: Common sbatch Options
Table 1. Job Scripts
| System | Connection Type | Script Location | Description of Default Behavior | Frontera | DCV | /share/doc/slurm/job.dcv |
Requests a DCV session, if no license is available then the job exits. Requests 1 node for 2 hours in Frontera's development queue |
DCV | /share/doc/slurm/job.dcv2vnc |
Requests a DCV session, but if no DCV licenses are available then a VNC session is submitted. Requests 1 node for 2 hours Frontera's development queue |
VNC | /share/doc/slurm/job.vnc |
Requests 1 node for 2 hours in Frontera's development queue |
Stampede3 | DCV | /share/doc/slurm/job.dcv
| Requests a DCV session, if no license is available then the job exits. Requests 1 node for 2 hours in Stampede3's skx-dev queue |
DCV | /share/doc/slurm/job.dcv2vnc
| Request a DCV session, tried to launch a DCV session but if none is available then a VNC session is submitted. Requests 1 node for 2 hours Stampede3's the skx-dev queue |
VNC | /share/doc/slurm/job.vnc
| Requests 1 node for 2 hours in Stampede3's skx-dev queue |
Lonestar6 | VNC | /share/doc/slurm/job.vnc
| Requests 1 node for 2 hours in Lonestar6's development queue. |
|---|
Start a DCV Session
Both Frontera and Stampede3 allow DCV connections. Follow the steps below to start an interactive DCV session on either resource. The command-line examples below demonstrate creating a session on Stampede3. You can follow the same steps to establish a session on Frontera.
-
Connect to Stampede3 or Frontera in your usual manner, e.g.:
login1$ ssh -l username stampede3.tacc.utexas.edu -
Submit one of two standard job scripts. If you submit the
job.dcv2vncscript, then either a DCV or VNC session is created. The following instructions demonstrate submitting thejob.dcvscript.Copy into your home directory, then edit either of the job scripts listed above to include your project allocation:
#SBATCH -A projectnameor you can provide the allocation number on the command line as an argument to the
sbatchcommand:login1$ sbatch -A projectname /share/doc/slurm/job.dcv login1$ sbatch -A projectname /share/doc/slurm/job.dcv2vncIn the following example we also override the time option, requesting one hour instead of the script's default of two hours.
login4(689)$ sbatch -A projectname -t 01:00:00 /share/doc/slurm/job.dcv ... --> Verifying access to desired queue (skx-dev)...OK --> Verifying job request is within current queue limits...OK --> Checking available allocation (TG-123456)...OK Submitted batch job 1965942 -
Poll the queue, waiting till the job runs...
You can poll the job's status with the
squeuecommand, waiting till the submitted job actually runs, or by waiting for the job output file, (dcvserver.outorvncserver.outdepending on the connection type and job script submitted), to appear in the submission directory.login4(690)$ squeue -u slindsey JOBID PARTITION NAME USER ST TIME NODES NODELIST(REASON) 1965942 skx-dev dcvserve slindsey R 0:16 1 c506-082If your job could not acquire a DCV license and launched a VNC session instead, jump to step 3 of the VNC connection instructions below.
-
Display the contents of the job output file to extract the web URL.
Once the DCV job starts running, a file called
dcvserver.outwill be created in the submission directory.login4(691)$ cat dcvserver.out TACC: job 1965942 execution at: Tue Aug 21 14:25:54 CDT 2018 TACC: running on node c506-082 TACC: local (compute node) DCV port is 8443 TACC: got login node DCV port 18606 TACC: Created reverse ports on Stampede3 logins TACC: Your DCV session is now running! TACC: To connect to your DCV session, please point a modern web browser to: TACC: https://stampede3.tacc.utexas.edu:18606 -
Load this generated URL in your favorite browser and then authenticate using your Stampede3 or Frontera password.
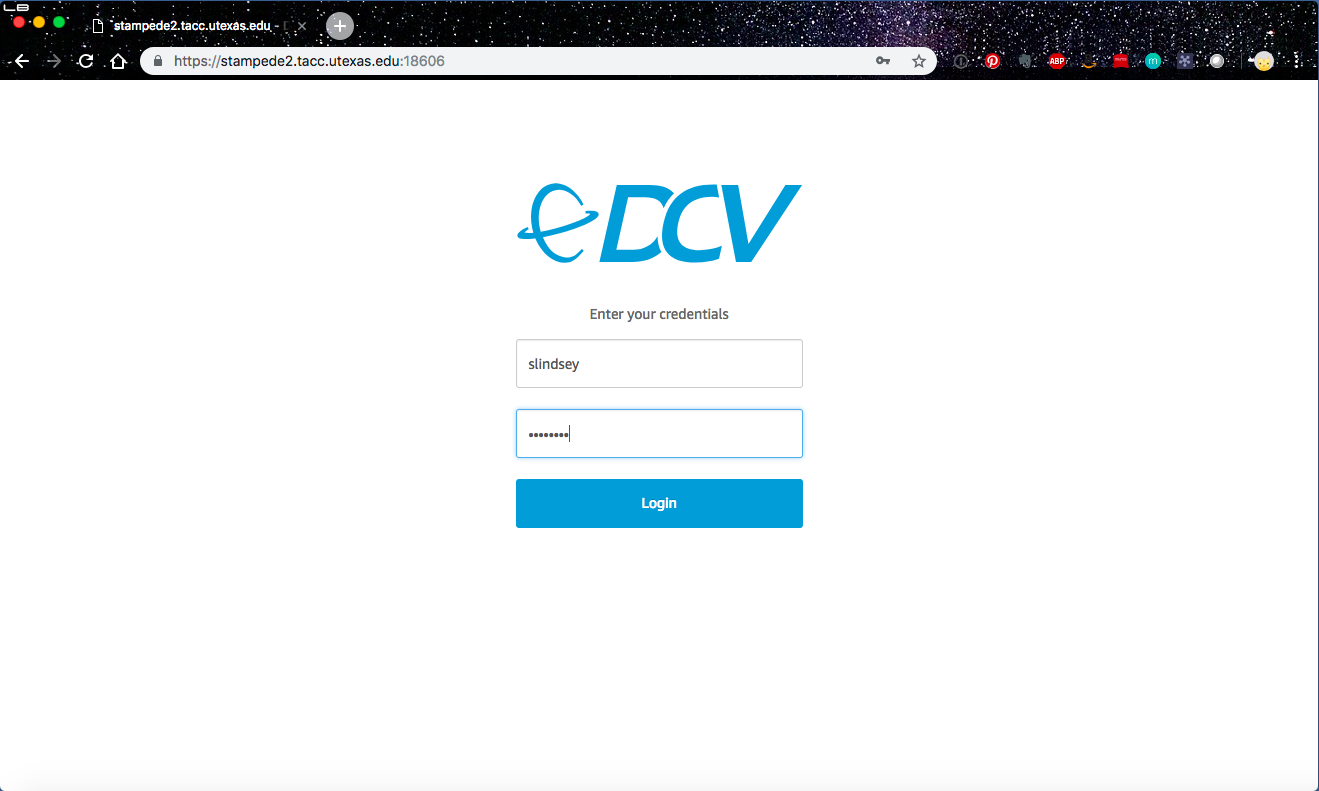
Figure 2. Authenticate with your Stampede3 password. -
Start your graphics-enabled application. Once the desktop is generated (Figure 3.), you can launch your applications. Here we run a simple visualization program,
glxgears. (Figure 4.)Tip
The "Terminal" button at the bottom of the DCV window creates a terminal without
ibrunsupport.
To create an xterm with fullibrunsupport, typexterm &in the initial xterm window.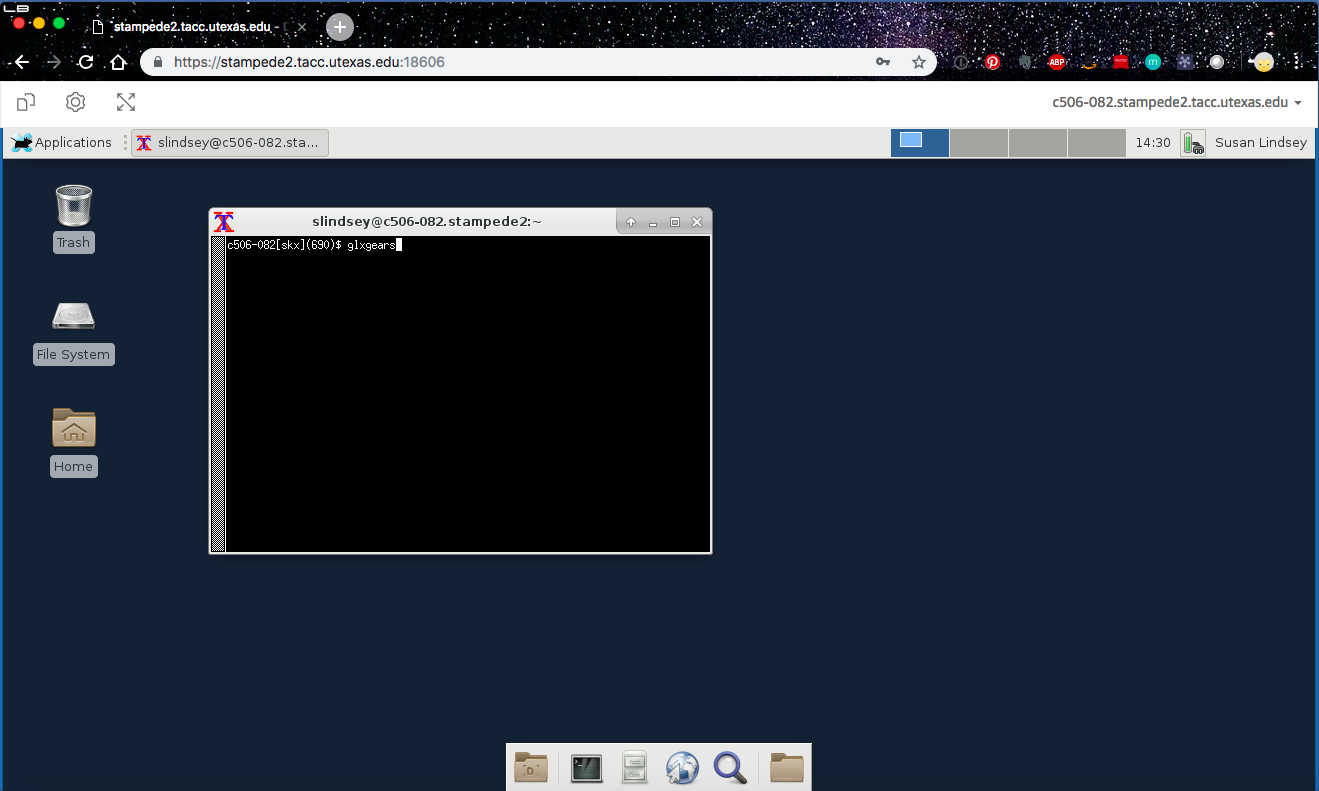
Figure 3. DCV Desktop in Chrome Browser 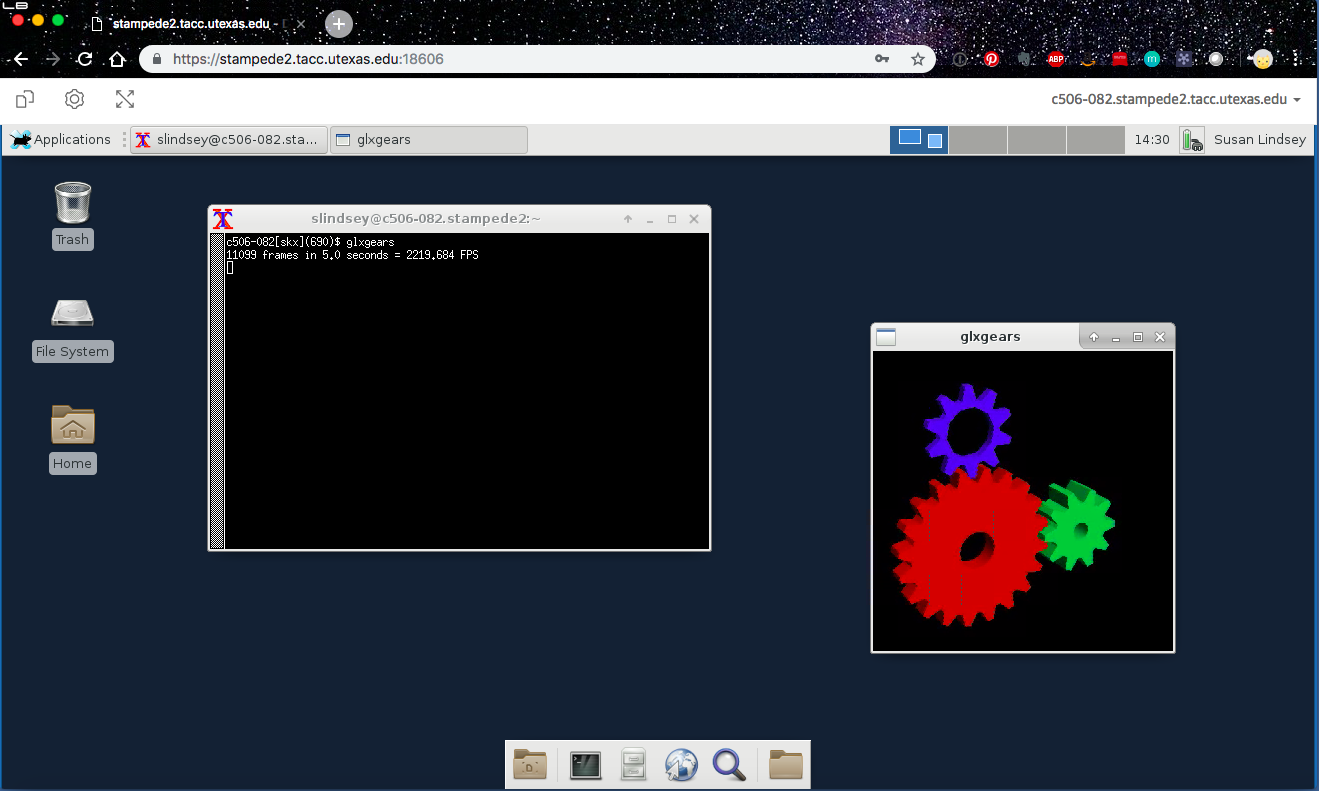
Figure 4. Run a visualization application -
Once you've completed your work and closed the browser window, remember to kill the job you submitted in Step 2.
login4(692)$ scancel 1965942
login4(693)$ exit
Start a VNC Session
Follow the steps below to start an interactive session.
Note
If this is your first time connecting to a resource, you must run vncpasswd to create a password for your VNC servers. This should NOT be your login password! This mechanism only deters unauthorized connections; it is not fully secure, as only the first eight characters of the password are saved. All VNC connections are tunneled through SSH for extra security, as described below.
-
Connect to the TACC resource in your usual manner, e.g.:
login1$ ssh -l slindsey ls5.tacc.utexas.edu -
Submit the standard job script,
job.vnc, see Table 1..TACC has provided a VNC job script (
/share/doc/slurm/job.vnc) that requests one node in Frontera'sdevelopmentqueue for two hours.login1$ sbatch /share/doc/slurm/job.vncAll arguments after the job script name are sent to the
vncservercommand. For example, to set the desktop resolution to 1440x900, use:login1$ sbatch /share/doc/slurm/job.vnc -geometry 1440x900 -
Poll and wait till the job runs...
login1$ squeue -u slindsey JOBID PARTITION NAME USER ST TIME NODES NODELIST(REASON) 1974882 development vncserve slindsey R 0:16 1 c455-084 -
Display the job's output file,
vncserver.out, to extract the port connection number:The
job.vncscript starts a vncserver process and writes the connect port for the vncviewer to the output file,vncserver.outin the job submission directory.The lightweight window manager,
xfce, is the default VNC desktop and is recommended for remote performance. Gnome is available; to use gnome, open the~/.vnc/xstartupfile (created after your first VNC session) and replacestartxfce4withgnome-session. Note that gnome may lag over slow internet connections. -
Create an SSH Tunnel to Stampede3
TACC requires users to create an SSH tunnel from the local system to the Stampede3 login node to assure that the connection is secure. On a Unix or Linux system, execute the following command once the port has been opened on the Stampede3 login node:
In a new local terminal window, create the SSH tunnel:
localhost$ ssh -f -N -L xxxx:stampede3.tacc.utexas.edu:yyyy \
      username@stampede3.tacc.utexas.edu
where
yyyyis the port number given by the vncserver batch jobxxxxis a port on the remote system. Generally, the port number specified on the Stampede3 login node,yyyy, is a good choice to use on your local system as well-finstructs SSH to only forward ports, not to execute a remote command-Nputs thesshcommand into the background after connecting-Lforwards the port
On Windows systems find the menu in the Windows SSH client where tunnels can be specified, and enter the local and remote ports as required, then
sshto Stampede3. -
Connect the VNC viewer
Once the SSH tunnel has been established, use a VNC client to connect to the local port you created, which will then be tunneled to your VNC server on Stampede3. Connect to
localhost:xxxx, wherexxxxis the local port you used for your tunnel. In the examples above, we would connect the VNC client tolocalhost::xxxx. (Some VNC clients acceptlocalhost:xxxx).Tip
TACC staff recommends the TigerVNC VNC Client, a platform independent client/server application.
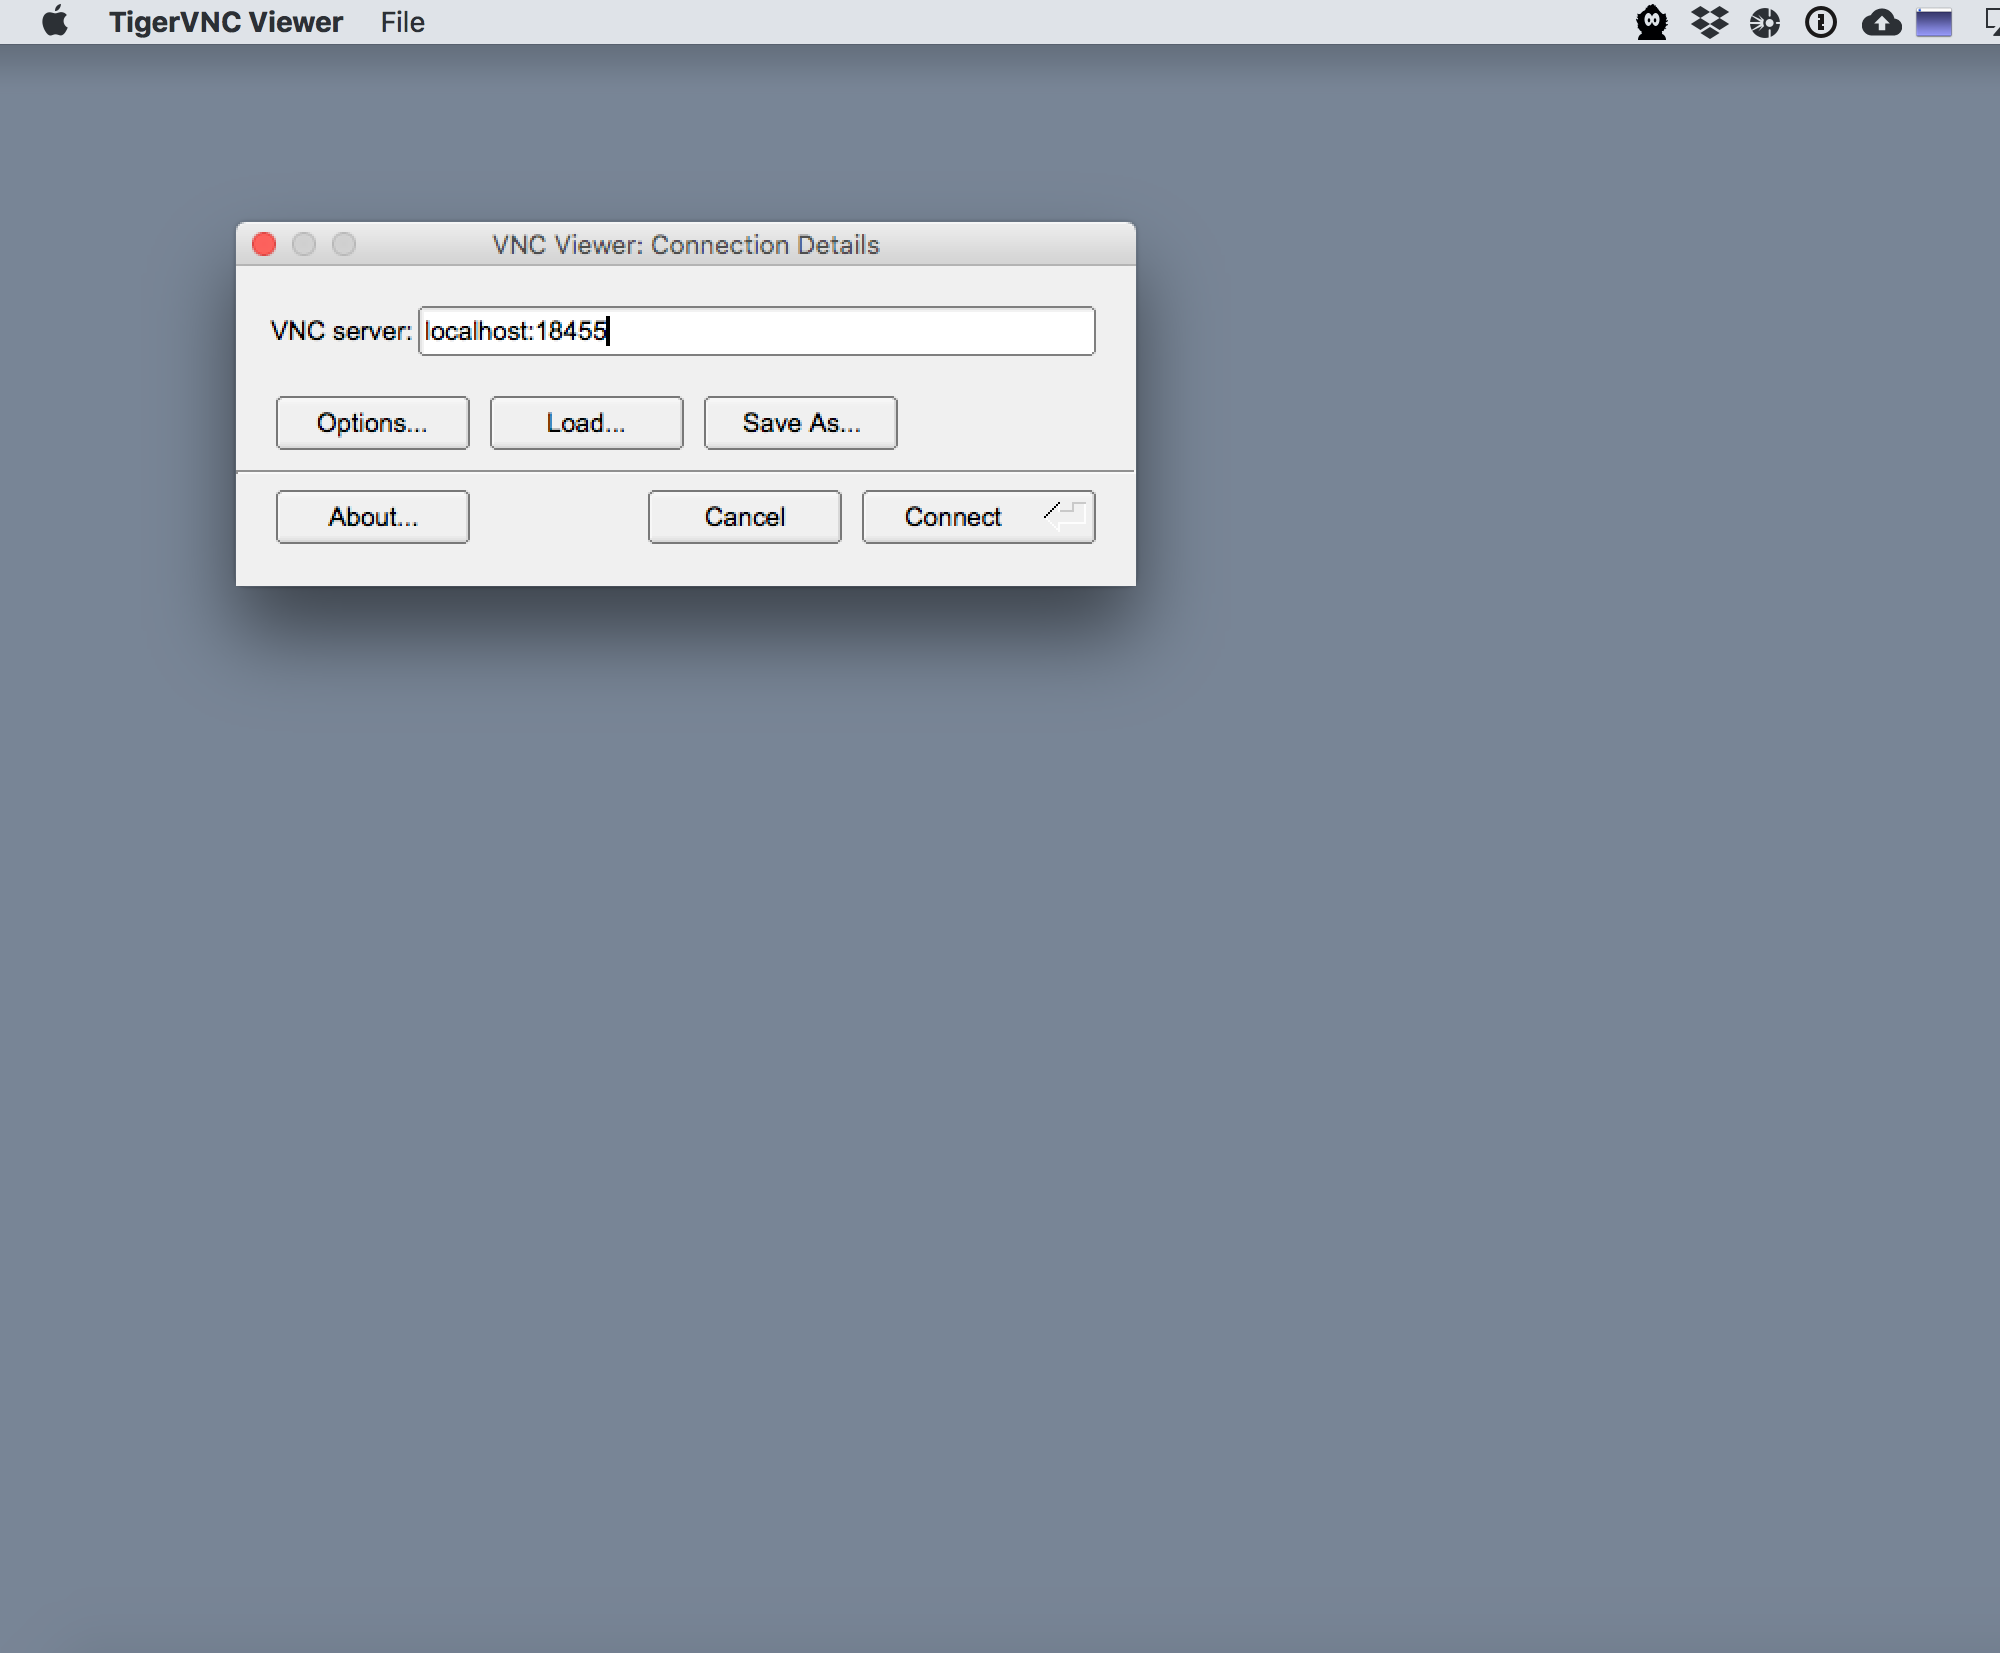
Figure 5. Connect the VNC client to the local port created in step 5. -
Once the desktop is generated (Figure 6.), you can start your graphics-enabled application. Here we run a simple visualization program,
glxgears. (Figure 7.)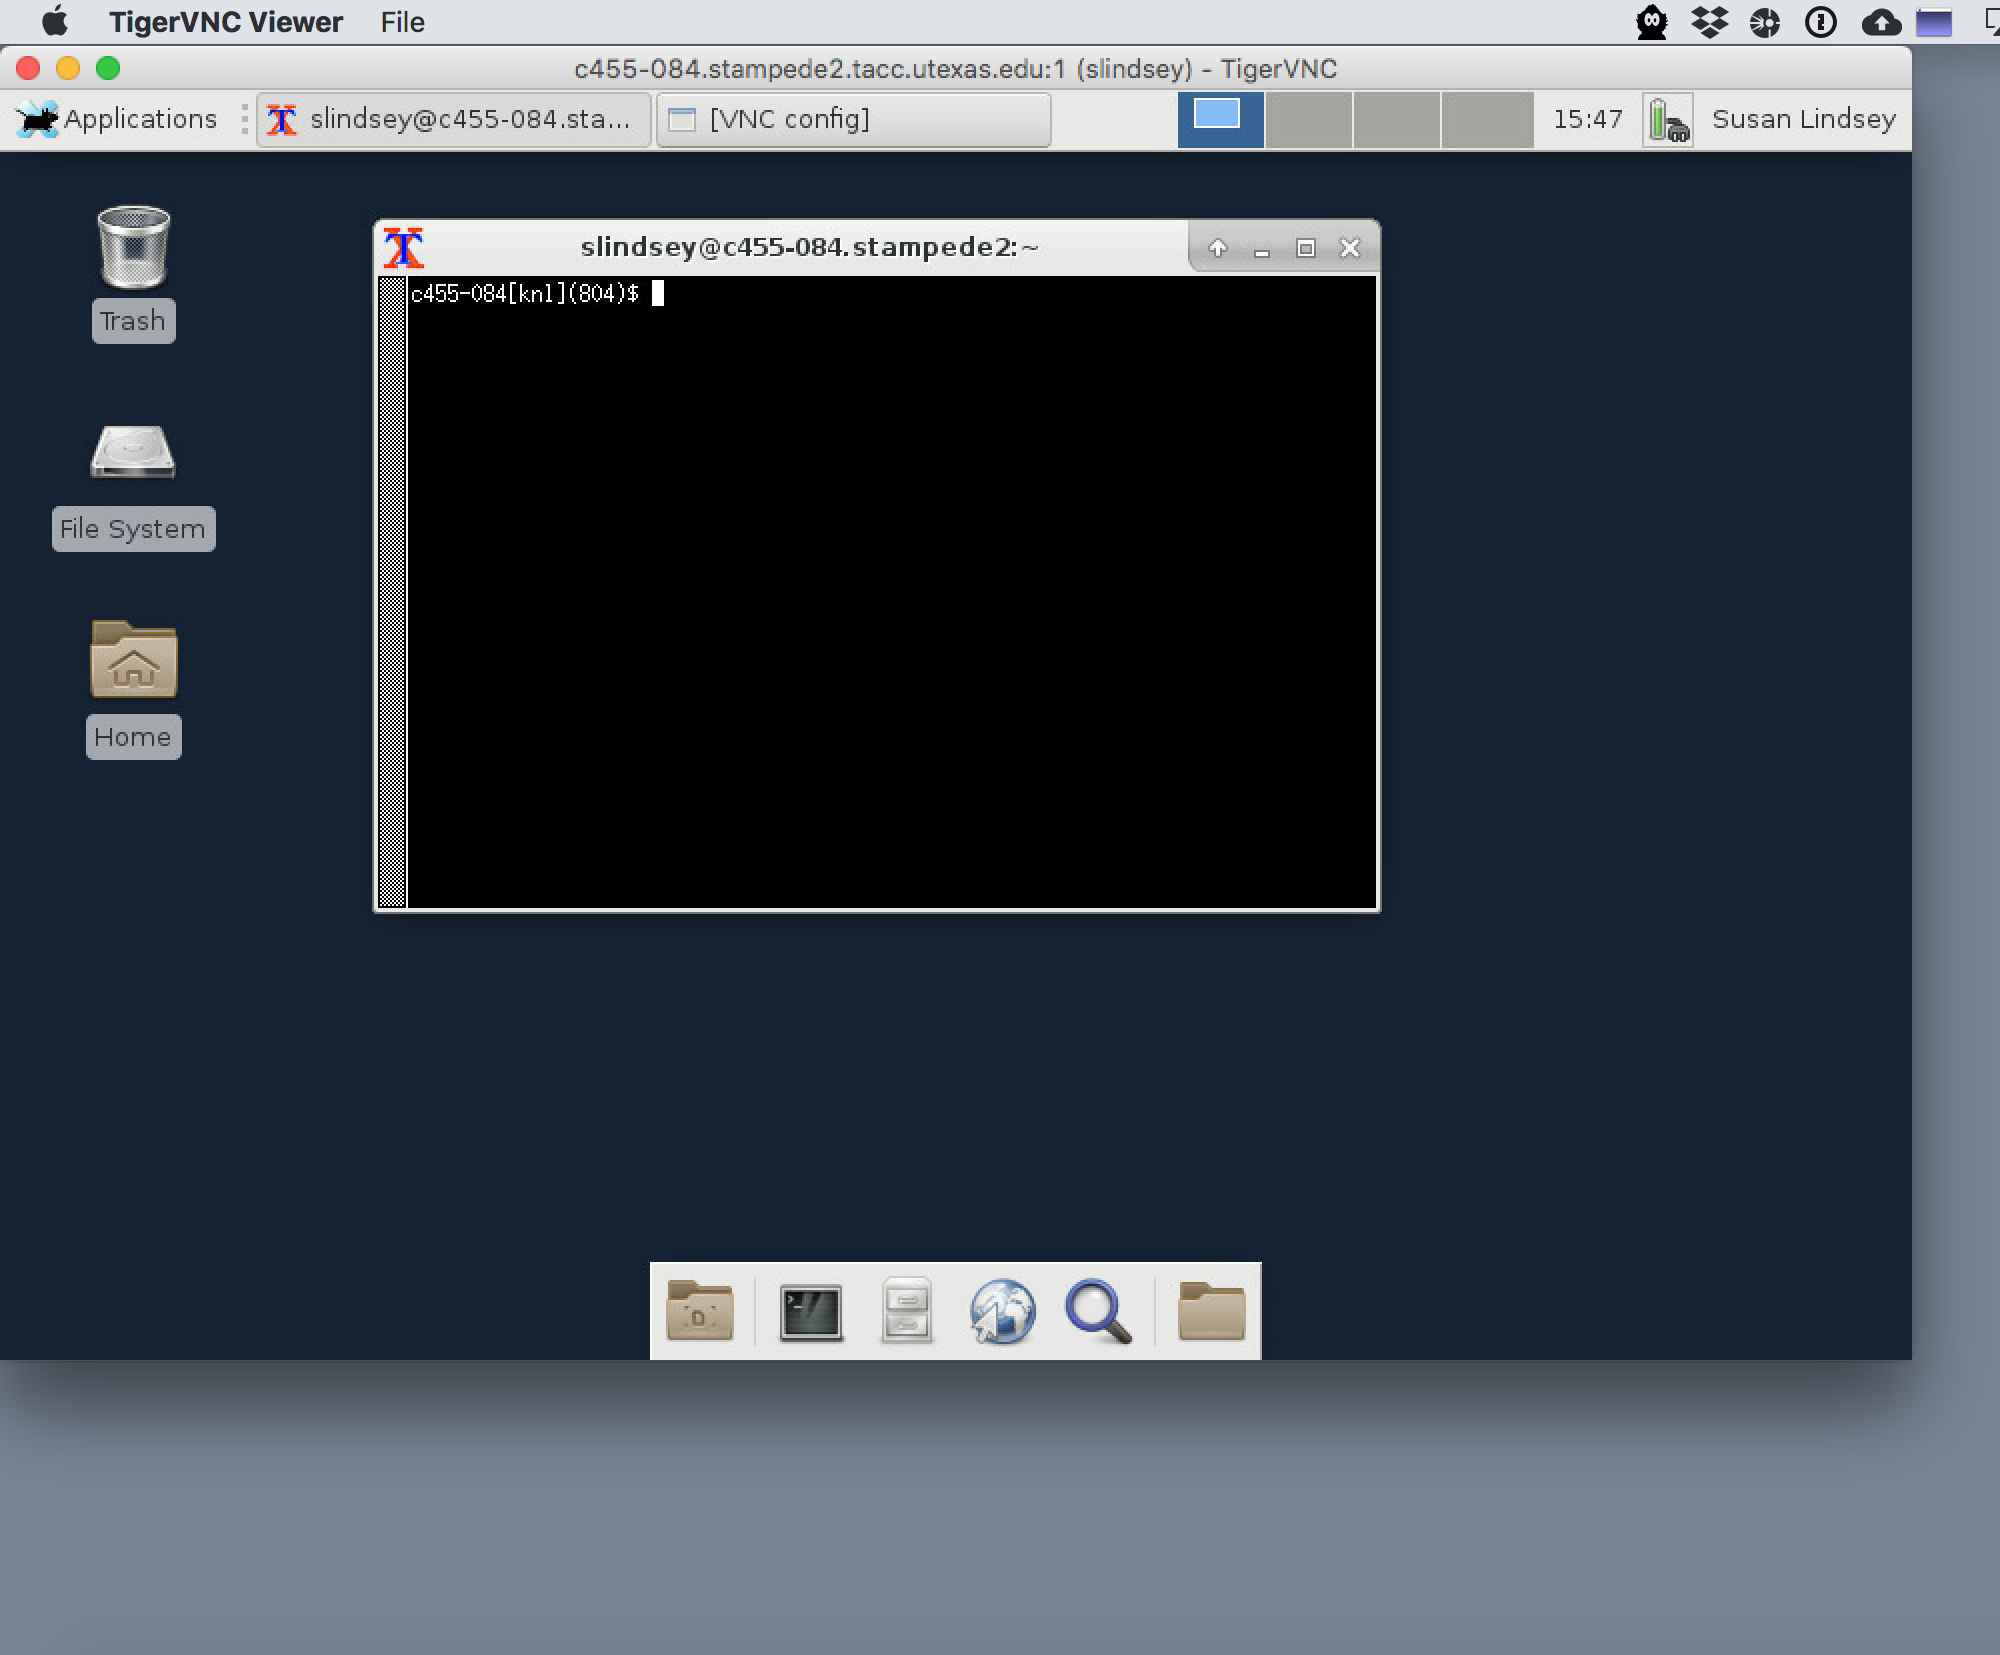
Figure 6. VNC Desktop 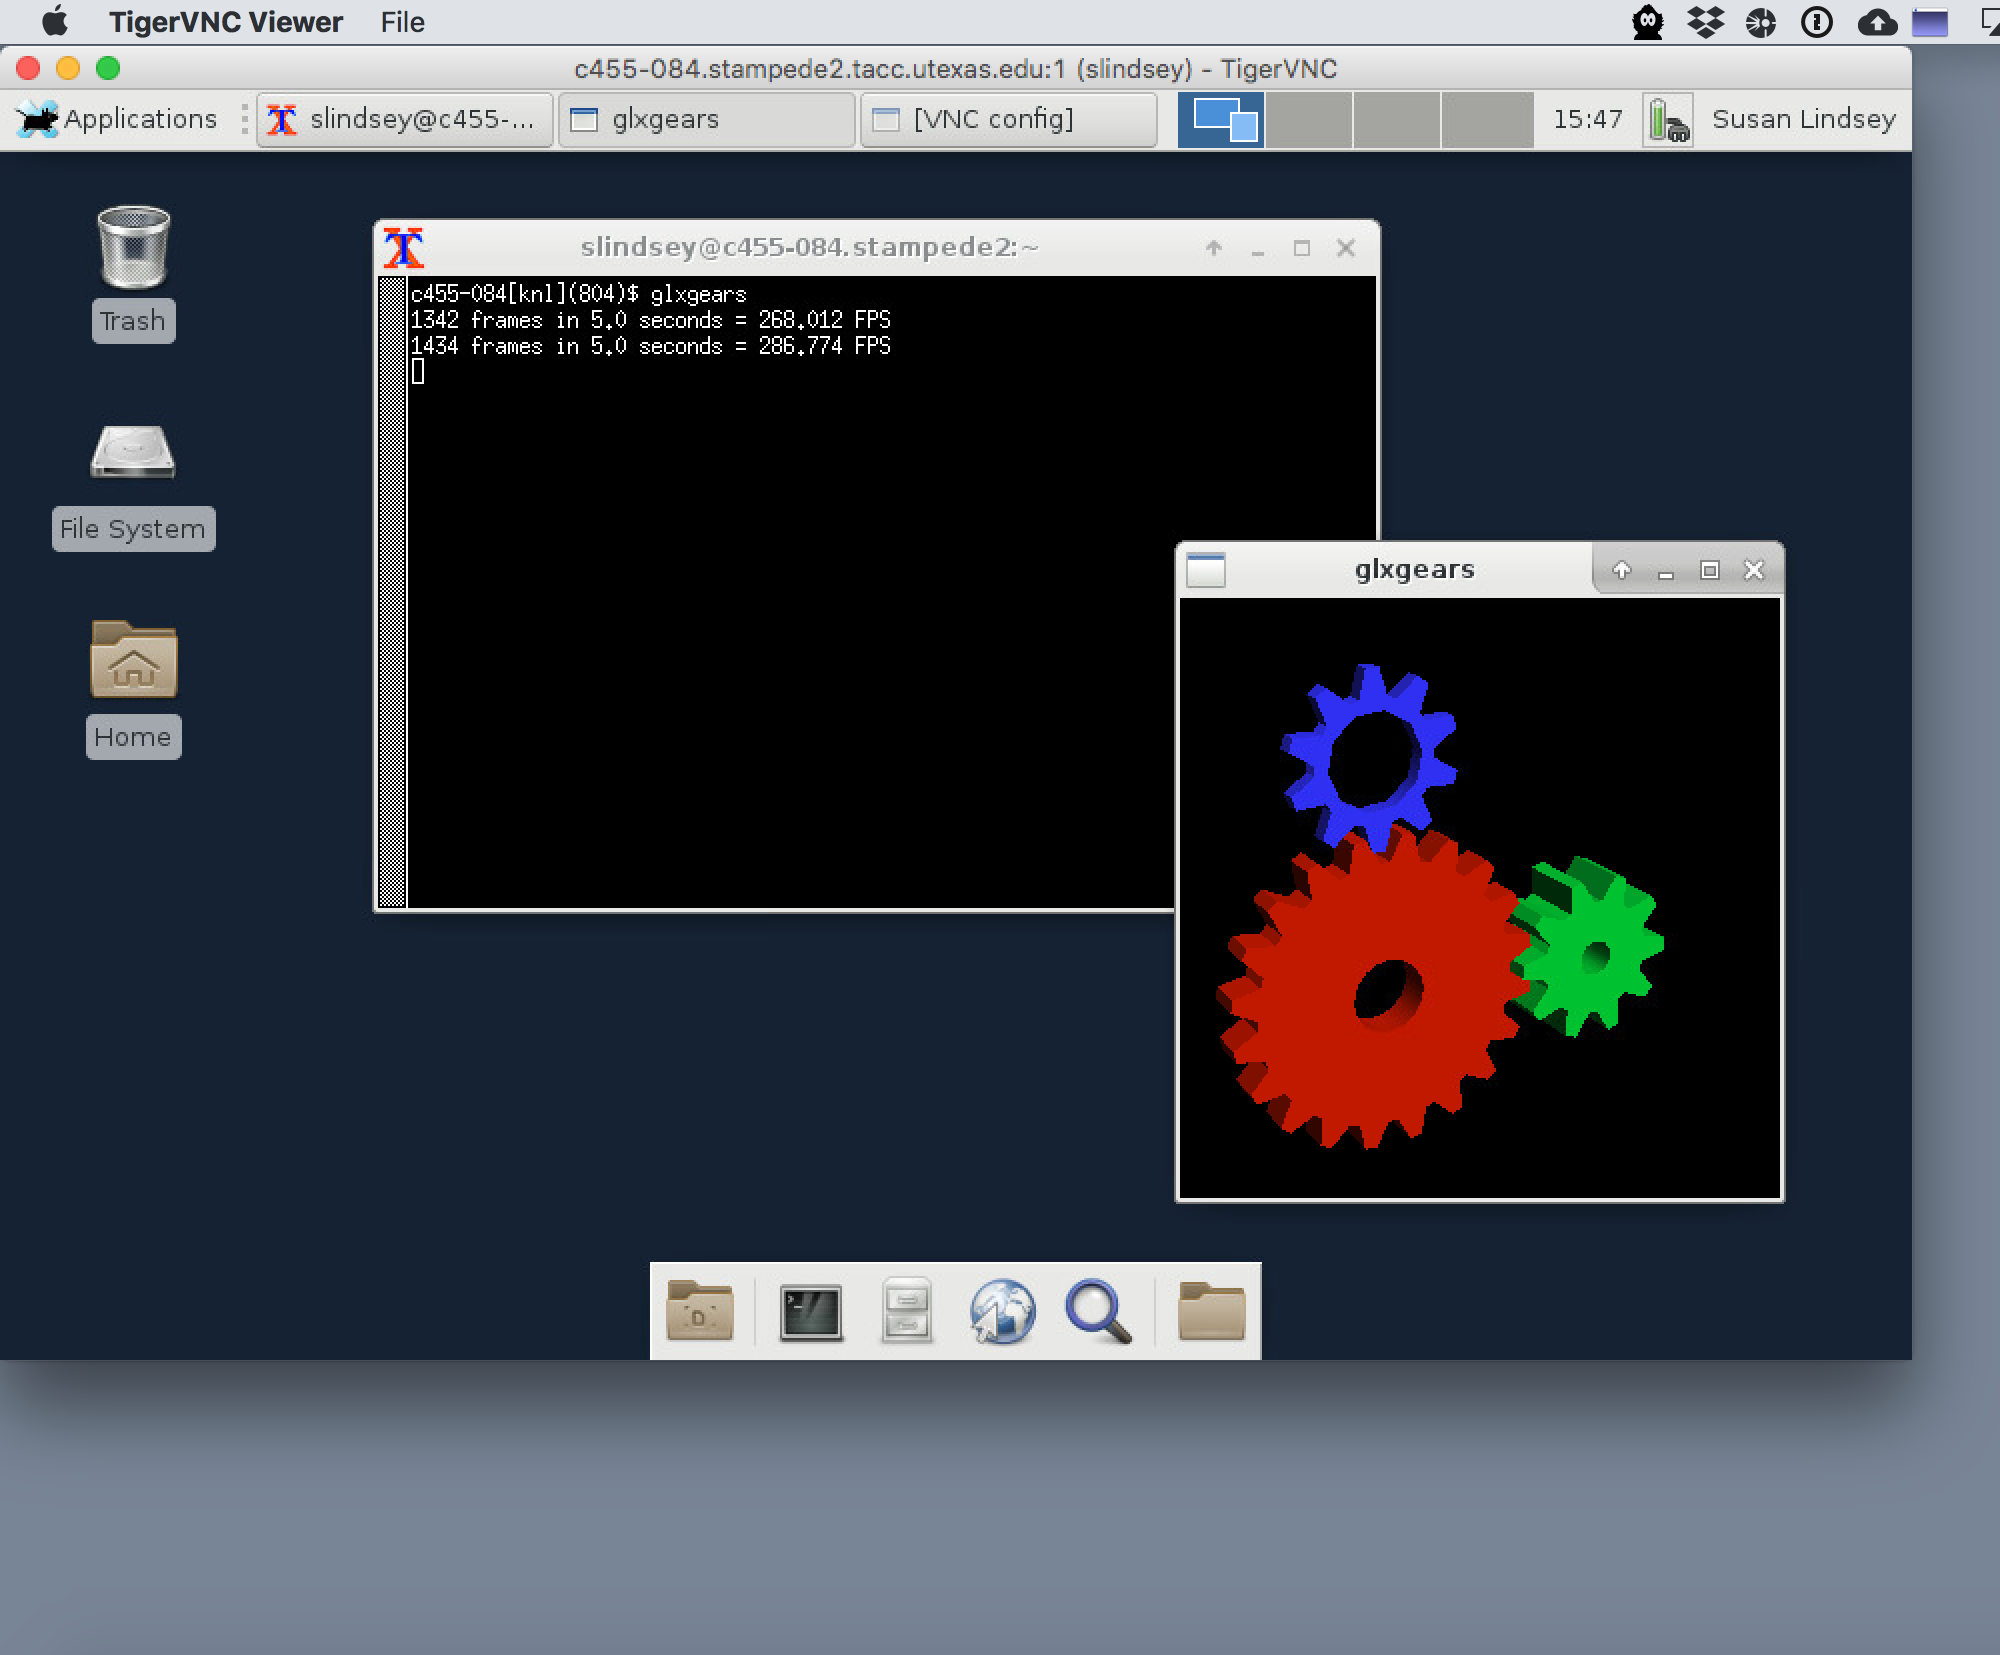
Figure 7. Run a Visualization Application Once the desktop has been established an initial xterm window appears. (Figure 6.) This window manages the lifetime of the VNC server process. Killing this window (typically by typing
exitorctrl-Dat the prompt) will cause the vncserver to terminate and the original batch job to end. -
Once you've completed your work and closed the browser window, remember to kill the job you submitted in Step 2.
login4(692)$ scancel 1974882
login4(693)$ exit
Sample VNC session
Window 1
Submit a VNC job for user slindsey.
localhost$ ssh slindsey@stampede3.tacc.utexas.edu
 ...
login4(804)$ sbatch -A TG-123456 -t 01:00:00 /share/doc/slur m/job.vnc
 ...
 --> Verifying access to desired queue (development)...OK
 --> Verifying job request is within current queue limits...OK
 --> Checking available allocation (UserServStaff)...OK
Submitted batch job STYLEBLUE1974882
login4(805)$ squeue -u slindsey
  JOBID   PARTITION     NAME     USER ST       TIME  NODES NODELIST(REASON)
1974882 development vncserve slindsey  R       0:16      1 c455-084
login4(806)$ cat vncserver.out
job execution at: Wed Aug 22 15:43:46 CDT 2018
running on node c455-084
using default VNC server /bin/vncserver
memory limit set to 93767542 kilobytes
set wayness to
got VNC display :1
local (compute node) VNC port is 5901
got login node VNC port 18455
Created reverse ports on Stampede3 logins
Your VNC server is now running!
To connect via VNC client:  STYLEBLUESSH tunnel port 18455 to stampede3.tacc.utexas.edu:18455
Then connect to localhost::18455
login4(807)$ scancel 1974882
login4(808)$ squeue -u slindsey
JOBID   PARTITION     NAME     USER ST       TIME  NODES NODELIST(REASON)
login4(809)$ exit
logout
Connection to stampede3.tacc.utexas.edu closed.
bash-3.2$ exit
Window 2
Create the SSH tunnel from your local machine to Stampede3
localhost$ ssh -f -N -L 18455:stampede3.tacc.utexas.edu:18455 slindsey@stampede3.tacc.utexas.edu
...
Password:
TACC Token Code:
localhost$
Running Apps on the Desktop
From an interactive desktop, applications can be run from icons or from xterm command prompts.
See the Stampede3 User Guide Visualization and Frontera User Guide Visualization sections for details on running parallel applications on the desktop.